
The recommendations given in the profile descriptions are parameter sets tested by Dreve. We recommend to follow them for ideal printing results.
When developing our print profiles for our Phrozen Sonic XL 4K in the Dreve version, it was particularly important to us to develop an ideally set parameter set for every conceivable application. To meet this demand, several print profiles for different materials are stored in the slicing software and described in detail here. To have the description of the profiles at hand at your workstation at any time, you will find a print version of the explanations here.
Please note: All models built directly on the platform must have a flat bottom side. Lowest points, especially in hollow layouts, should be avoided or supports should be used.
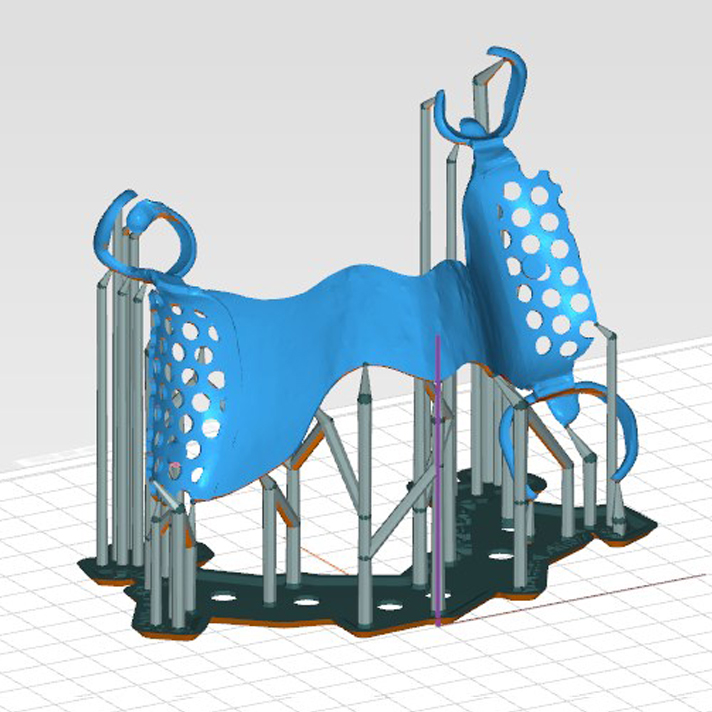
FotoDent® splint
Version v4_1
Layer height: 100 µm
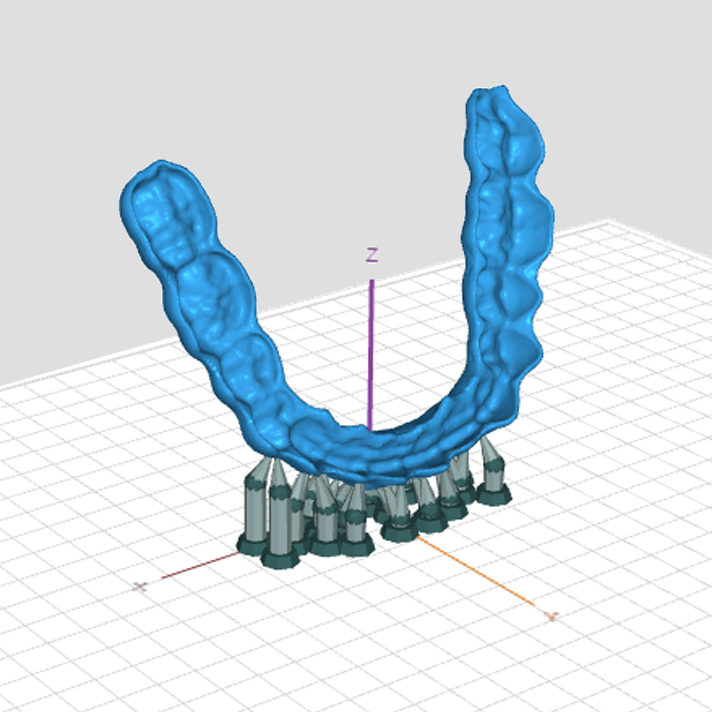
Dental splints
Place exclusively vertically and inclined at an angle of 15°-35°. Avoid critical areas by inclined positioning and support them otherwise using the "Dreve FotoDent splint v4_1" support profile.
For an ideal fit and optimum wearing comfort in the patient's mouth, we strongly recommend that the parts are only provided with support structures in labial areas.
FotoDent® biobased model
FotoDent® model 2
Version v4_1
Layer height: 100 µm
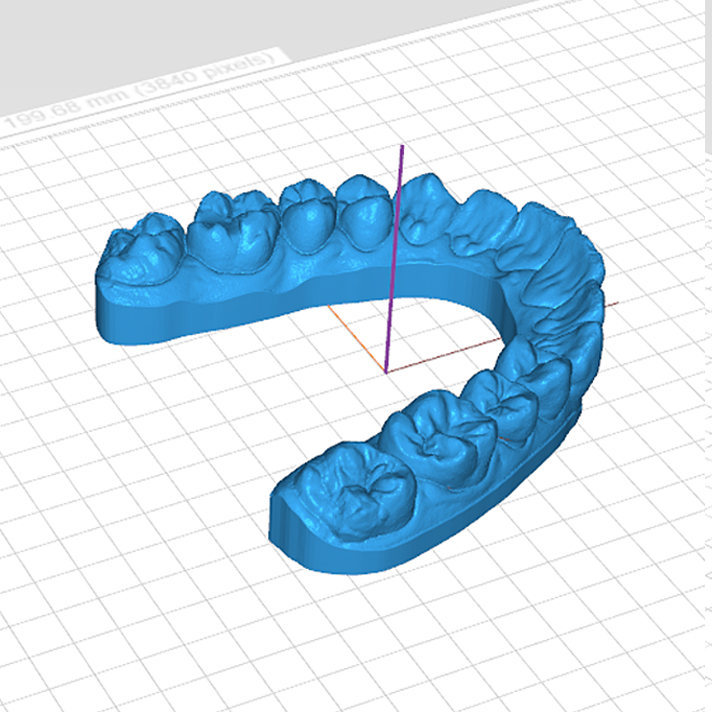
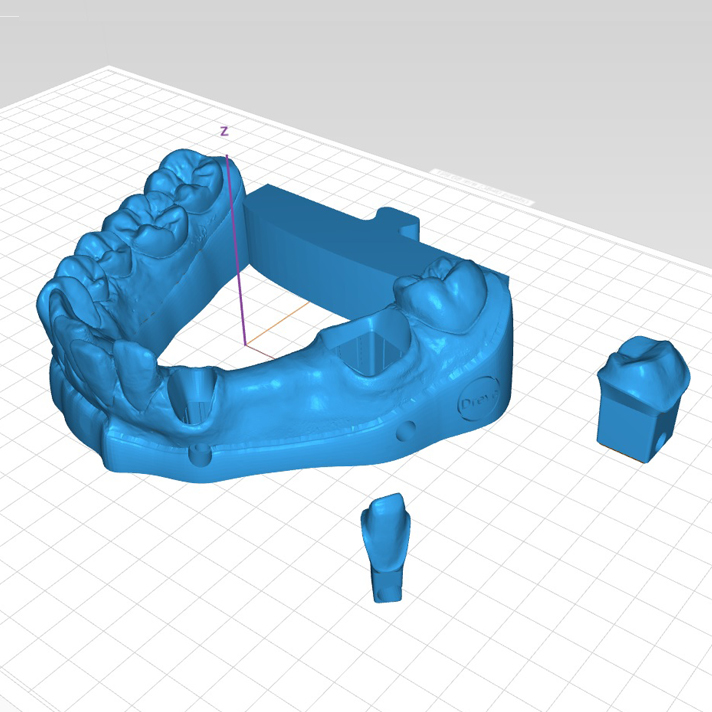
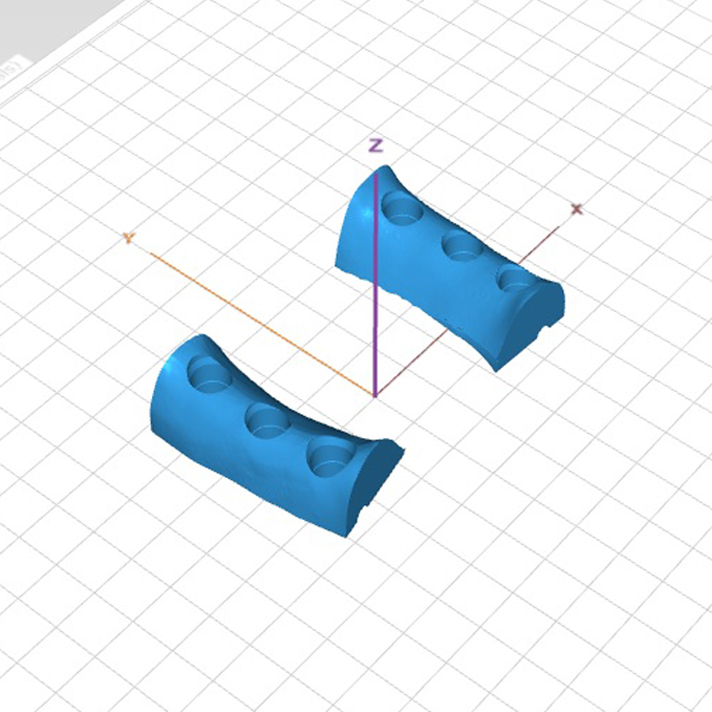
Horseshoe models horizontal
Solid, hollow or with honeycomb structure (see additional parameters). Maximum width: 15mm.
This profile is designed for quick printability of horseshoe models. If the models are distally equipped with a connecting bar or exceed the maximum width, please use profile v4_2.
Version v4_2
Layer height: 100 µm
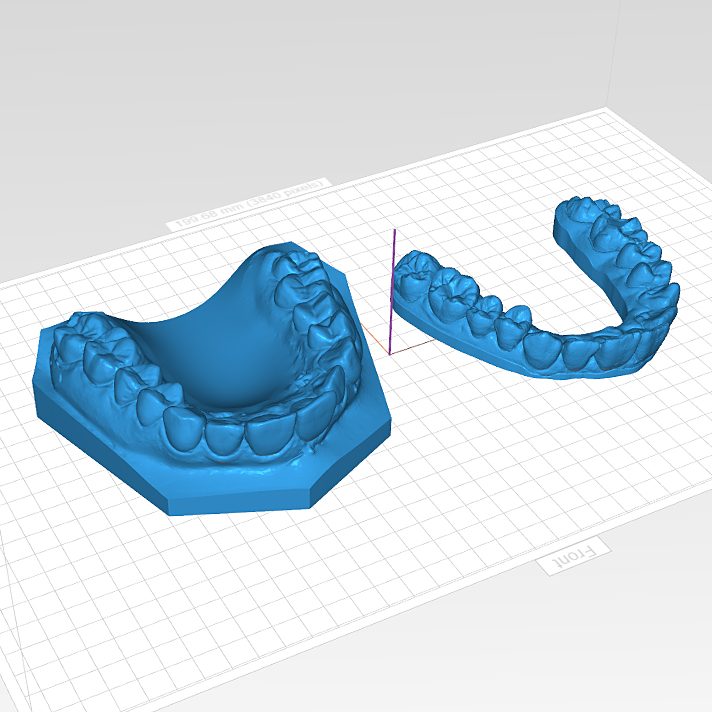
Horseshoe models and models with plate horizontal
Solid, hollow or with honeycomb structure (see additional parameters). All dental model geometries can be printed.
This profile has been adjusted for processing all dental model geometries. Both slim horseshoe models and solid base models can be processed with this print profile without any problems.
Version v4_3
Layer height: 100 µm
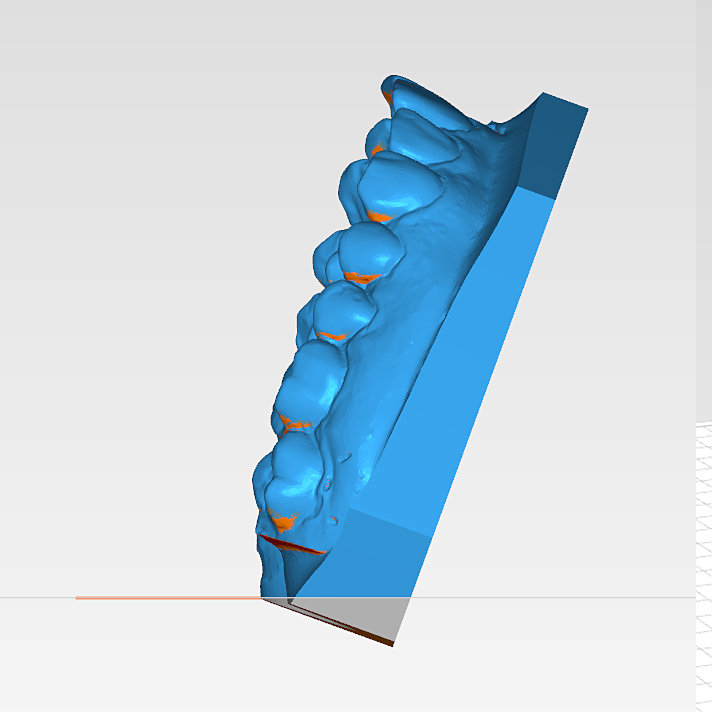
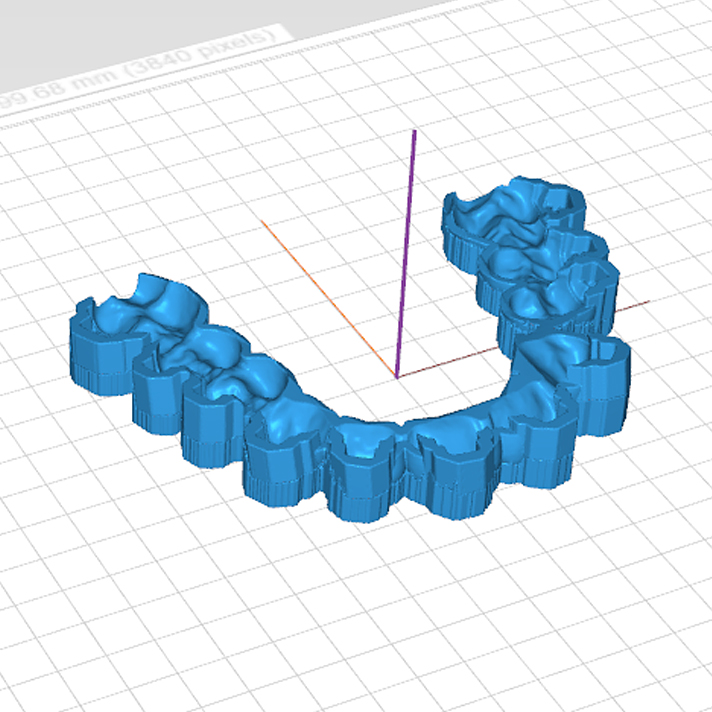
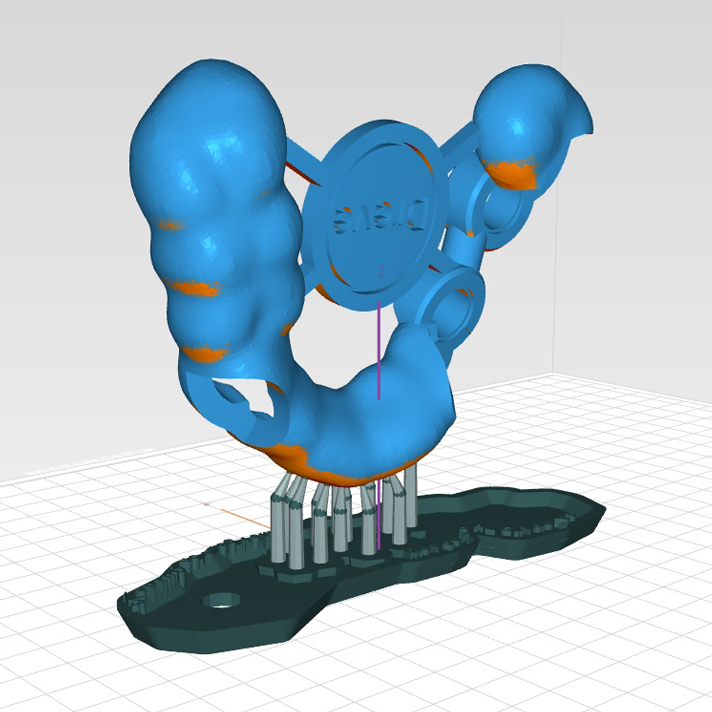
Horseshoe models and models with plate vertical inclined
at an angle of 20°
Solid, hollow or with honeycomb structure (see additional parameters). For horseshoe models set up vertically, we recommend a connecting bar between the two ends.
By inclining the components at a 20° angle, the best possible dimensional accuracy can be achieved. The connecting bar on vertically set-up horseshoe models ensures that the models get a better connection to the platform and can be manufactured dimensionally accurate and dimensionally stable in all directions.
Version v4_4_low
Layer height: 50 µm
Horseshoe models, models with plate and models with
removable dies horizontal
Solid models, also with removable dies. Modified parameter set for a looser fit of the removable dies.
We recommend using this profile if the fit is too tight in models with removable dies with the standard profile v4_4_med.
Version v4_4_med
Layer height: 50 µm
Horseshoe models, models with plate and models with
removable dies horizontal
Solid models, also with removable dies. Standard parameter set for a good fit of the removable dies.
This print profile is optimised for printing models with removable dies. If the fit is too loose, we recommend using the V4_4_xtr profile; if the fit is too tight, use the v4_4_low profile.
Version v4_4_xtr
Layer height: 50 µm
Horseshoe models, models with plate and models with
removable dies horizontal
Solid models, also with removable dies. Modified parameter set for a tighter fit of the removable dies.
We recommend using this profile if the fit is too loose in models with removable dies with the standard profile v4_4_med.
Additional parameters
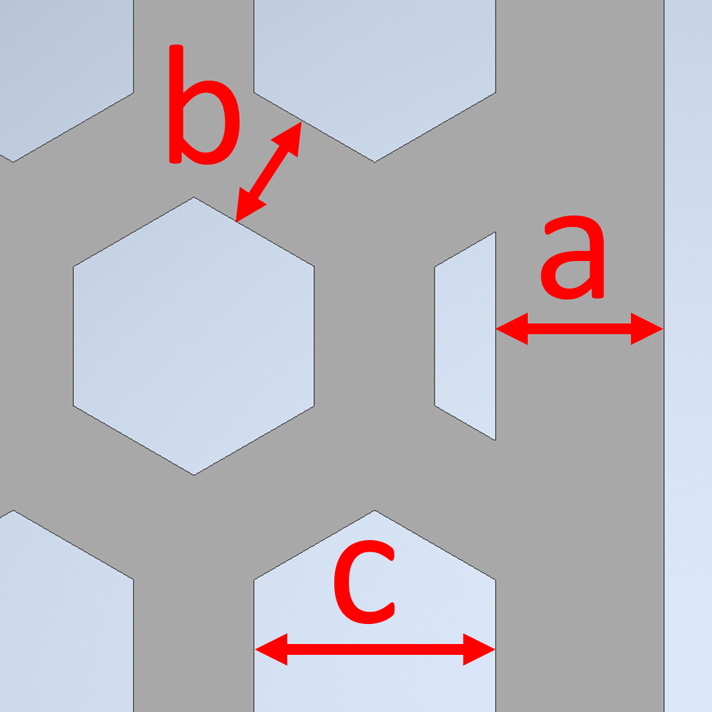
a) wall thickness 2-4 mm
b) inner wall thickness 1-2 mm
c) honeycomb size 3-5 mm
In addition, the use of drainholes is advised.
FotoDent® tray2
Version v4_1
Individual impression trays
Plane handle end, direct vertical printing on the platform with support at necessary points.
The placement of the handle ensures that the peeling forces after each layer do not have to be absorbed by support structures alone, but are transferred directly into the solid component. The printing success of even more complex impression trays can thus be guaranteed.
FotoDent® IBT
Version v4_1
Indirect bonding trays
Place exclusively horizontally and without support on the platform.
For the best possible print result, we recommend designing the indirect bonding tray with a completely flat underside. This design allows the components to be ideally placed on the platform and printed.
FotoDent® cast
Version v4_1
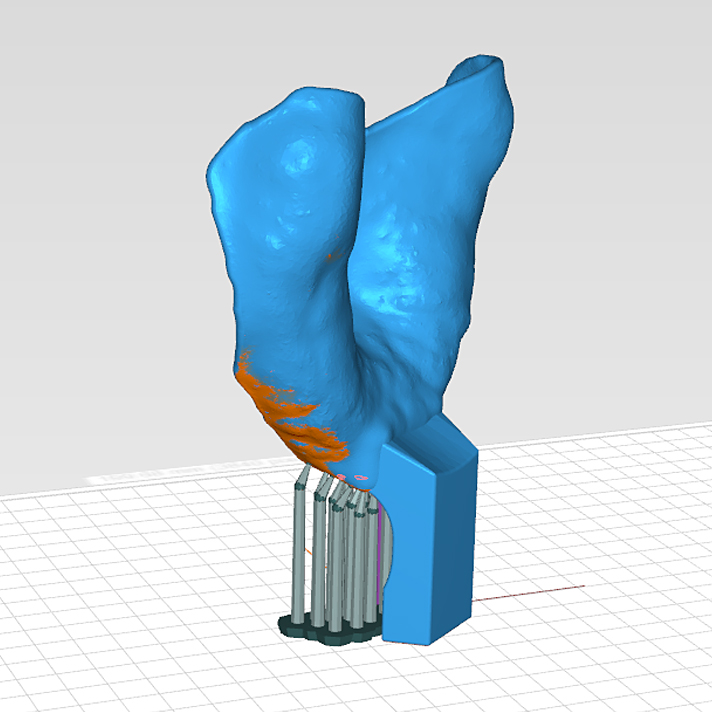
Cast objects
Avoid critical areas by inclined positioning and support them otherwise.
The possible and sometimes very different geometries of dental model casting objects can be printed with this print profile. By slightly inclining the objects, the number of necessary support structures can often be decisively reduced. Please note that the support structures should ideally not be placed at important contact points of the finished object in order to ensure the best possible fit.
FotoDent® guide405
Version v4_1
Drill guides
Place exclusively vertically and inclined at an angle of 10°. Avoid critical areas by inclined positioning and support them otherwise.
To ensure the best possible dimensional accuracy, we recommend fixing the base plate of the support structure on a slide during post curing and curing the components lying down. Please do not remove the support structure until the post curing process is complete.
FotoDent® denture
Version v4_1
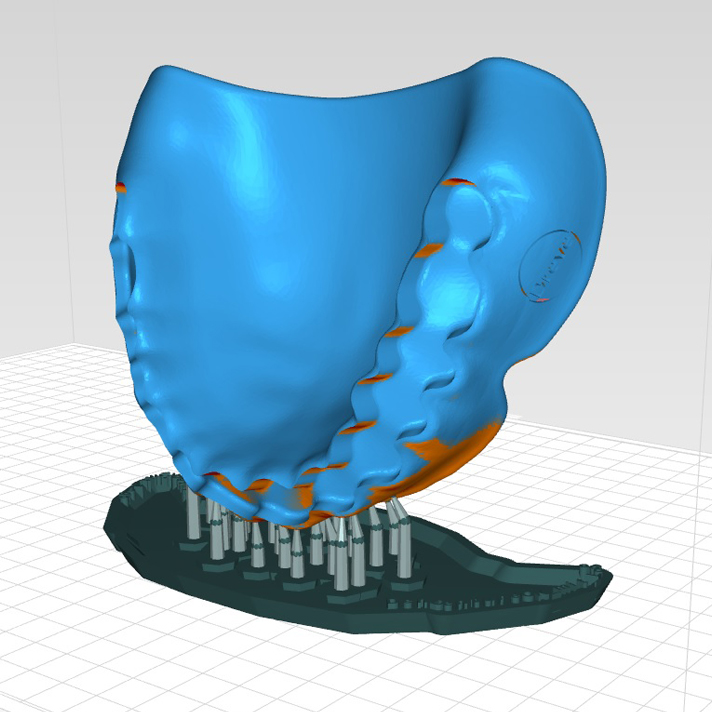
Denture bases
Place exclusively vertically and inclined at an angle of 10°. Avoid critical areas by inclined positioning and support them otherwise.
For an ideal fit in the patient's mouth, we strongly recommend not to place support structures in areas facing the palate. Manual post processing when removing the support structures can have a decisive influence on the necessary fit for an optimal fit of the prosthesis.
FotoDent® gingiva
Version v4_1
Gingival mask
Place exclusively horizontally and without support on the platform. When designing the mask, make sure that the underside is flat.
The gingival masks are suitable for insertion into dental models made of model resin. The masks produced with this print profile can be inserted into models made using either a 50 µm or a 100 µm process.
Our experts
DIY: Having decided for 3D printing is an innovative step for your workflow. However, sometimes especially the implementation and getting started can be challenging, not only for beginners. Our experts for dental additive manufacturing and 3D print are glad to support you on your way. They guide you through the process so that you will succeed and get your parts printed.
Sonic XL 4K
Support
Materials